This granite install overview answers some basic questions and provides useful tips on granite counter installation, finding a granite installer, and how to spot the difference between quality stone installation and shoddy work.
If you’re considering having remodeling or repair work done in your home, or you’re considering installing granite countertops, save yourself potential hassles and feel the comfort that comes from making the right decision.
Contact Angie’s List for reviews and recommendations. None of the contractors pay to get listed!
1. Prepare Your Cabinets For Granite
3CM thick countertop granite generally does not need any additional preparation other than level and secured cabinets. For 2CM thick tops that have a laminated edge, it is recommended that you apply ¾ inch plywood sub-
How to install granite countertops
This will add support above appliances such as dishwashers and compactors, support holes for sinks and cooktops and also help support small cantilevered ends and breakfast bars. See more kitchen remodeling tips and advice.
One advantage to plywood is that you can level the slabs much more easily without moving them once they are in place. In any event, if you are using frameless (European style) cabinets or framed cabinets that have upper retractable cutting boards, you will need to raise the granite ¾ inch to clear the double bull-
If you have overhangs or spans that need support, be sure to have granite countertop support brackets in place before installing granite countertops.
Installing granite tile countertops requires something completely different than installing slab countertops. Tile counters are installed by laying individual granite tiles into place. This counter has none of the weight or breakage concerns of slab granite.
Questions? Contact GraniteCarePro
2. Decide Where You Want Seams
Almost all kitchens will have granite countertop seams in the stone. Usually they are difficult to see from a distance. If you look for them, you will find them. Granite is seamed by laying the granite slabs next to each other with a 1/16″ gap (maximum) between them. Level and shim the tops, then mix pigmented 2-
3. Choose The Right Sink
Self rimming sinks are sinks that lay on top of the granite and typically have a rim that is one-
Try to leave at least 3 inches of stone on front and back. Always double check your planned cut-
Before you do any cutting, support the entire length of the slab of countertop with 2×4’s so that its weight is evenly distributed. Make sure none of the blocks are under your cut-
Cut the straight lines of your cut-
Most kitchen sink templates have 4 inch radius corners. The corners are cut using a 4 inch grinder with a diamond blade. Cut at an angle at least half way through the granite. If you can’t cut on the line then make the hole smaller (you can always fix the hole later with the grinder).
Next, just drop out the triangles, knocking gently. A circular template, usually found in bathrooms, would be cut out mostly with the grinder. The center cuts could still be done with a circular saw.
How to cut a hole for an undermount sink
Your granite fabricator will follow the procedure for a self-
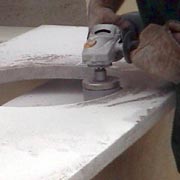
The edges will have to be straightened out and “cleaned out” with a 4 inch silicon-
The edges will have to be straightened out and “cleaned out” with a 4 inch silicon-
The straight lines will have to be cut more carefully and slowly, preferably wet-
The edges can be polished by hand using a polishing kit made up of velcro-
Blocks can be glued to the bottom of the granite counter to support the sink away from the sides.
4. Consider How Granite Will Line Up With Your Cooktop
Cooktops come in many different variations. They may look similar but each requires granite fabrication and installation to be slightly different. A mistake in planning and install will bug you for years when you notice it every day.
Decide up front with your fabricator where you want stone and where you don’t. Keep in mind, stone strips near cooktops are often the thinnest and weakest pieces in your kitchen.
Follow the same instructions as for a self rimming sink. You will normally find that the template for a cooktop has 90 degree corners, making it easier. It’s critical to support the top with absolutely no deflection or you will risk cracking the stone top.
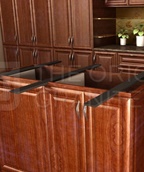
Hidden brackets for indoor and outdoor countertop support
Need to find a really good grainte countertop fabricator and installer?
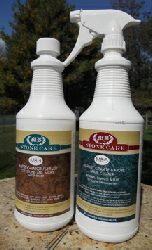
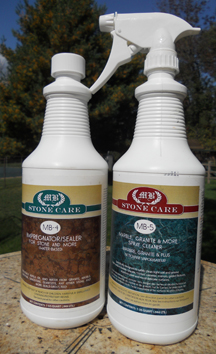
The same great professional grade sealer and daily cleaner that we recommend, with the added benefit of major cost savings to you! You need both products, so how about a discount when you combine them in one purchase.
Unlike silicon sealers, MB-
MB-
Silver Kit – 1 Bottle MB5 & 1 Bottle MB4 $55.71
Gold Kit – 2 Bottles MB5 & 1 Bottle MB4 $68.72
How to make a perfect granite seam
A quality stone install is indicated by good granite countertop seams. First, you need a perfectly smooth cut on the edges of the pieces being joined. The pieces must also be leveled and shimmed so that the seam line is smooth and both sides are the same height.
Leave a little space in between the two tops (1/16 inch or less). Next, place strips of masking tape along both sides of the seam to protect the stone from getting seam material on areas where you don’t want it.
Mix a small amount of 2-
Smooth the material down the entire length of the seam to eliminate voids or high spots. Remove the tape and let it dry. After a few minutes, you can “slice” excess material off the seam with a razor blade. Buff the seam with “0000” steel wool.
See Granite Seams for a great example of how this should look. Also, here’s how choosing the right granite sealer will impact your installation.
Corbels For Granite Countertops
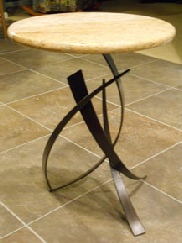
You need solid support for stone tops. Here’s a selection of handmade, wrought iron and steel brackets and corbels for granite countertops all made in the US. Each is designed to support the weight of stone counters, but styled to compliment your kitchen . . . More Countertop Supports
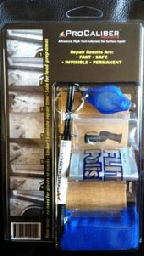
Here’s a more economical granite repair kit. The Procaliber Granite and Marble Repair Kit costs less and requires no color mixing. 15 minutes start to finish.
Click Granite and Marble Repair Kit for instructions and details.


