Why is rodding granite so important for your countertops?
Here’s why . . . rodding involves inserting steel rods secured with epoxy or polyester resin in the bottom face of granite along both sides where cutouts (sink holes) are required.
In 2000, the Marble Institute of America (MIA) conducted laboratory tests to determine the conditions under which rodding stone countertops may be beneficial.
The laboratory tests measured the flexural strength of reinforced and unreinforced samples of granite.
Test results indicated that threaded round steel rods significantly strengthen the stone by 50% in load and 600% in deflection.
So how do you tell the difference between a so-
The MIA now recommends rodding granite countertops . . .
What does this mean for the granite fabricator/installer? Rodding countertops at the weakest point, i.e., at cutouts, can significantly reduce waste and breakage when moving and installing the countertop. But what does this mean for you, the customer?
Even after the countertop is installed, rodding will help protect weak areas from breakage caused by cabinets settling, or by misuse of your countertops (standing on them). Caution: It is not appropriate to use a rodding technique for granite repair. To fix granite that has broken by inserting rods is simply a bad idea.
Here’s How To Rod Granite
1. After cutting the stone to size, lay out the piece for additional cutouts such as sinks, cooktops, faucets, outlets, notches and other cutouts.
2. Once you have completed the layout of any cutouts, then lay out the location(s) for the rod(s). Be sure that the rod(s) will extend beyond the cutout area by at least a couple inches on each side.
3. Place the top face down on a smooth, soft, flat and clean surface on a work or saw table.
4. Select a blade that is 1/8 inch thicker than the 3/8 inch width of the rod or make two passes on your cut.
5. Mark the blade about 1/8 inch deeper than the depth of the rod.
6. Cut the rod slot in the marked section on the bottom of the stone. Be sure to extend your cut far enough for the full length of rod to fit in (allowing for the curve of the blade) Cutting granite countertops takes patience.
7. Check the rod in the slot to verify the fit.
8. Remove the rod with a putty knife or a regular screwdriver.
9. Clean the stone and allow it to thoroughly dry.
10. Abrade the rod with a course grit abrasive, clean it, and allow it to thoroughly dry.
11. Mix a flowing consistency adhesive, and pour it into the slot of the stone (polyester or epoxy).
12. Quickly insert the rod fully into the slot. Then wipe the excess adhesive over the slot to completely cover the rod.
13. Allow the adhesive to cure completely before moving the stone.
Rodding takes time but adds very little to the granite cost. The value of this form of insurance is priceless and every fabricator should include rodding in their countertops.
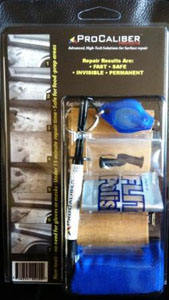
Deluxe Do It Yourself Stone Repair Kit
Easily repair granite countertops with the Natural Stone Repair Kit. Only $29 gives you everything you need to repair granite cracks and chips. Complete instructions, do it yourself.
Only: $28.99
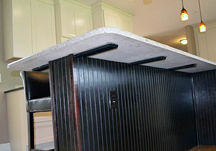
Make your granite bar tops & islands appear to float!
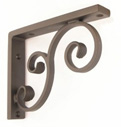
Hidden supports for granite & quartz countertops made of 1/2” thick steel from Original Granite Brackets .
Helpful granite links . . .
Return from Rodding Granite to Granite Buyers Guide

